Friday, September 26, 2014

80s inspired charm necklace


I bought a crazy rainbow striped dress this week that looked like a pack of Lifesavers to wear to a vinyl toy art show that I was participating in. I was afraid it was too loud, but wanted a perfect piece of jewelry to wear with it. The colors reminded me of the crazy 80s, so I decided to pull a bunch of awesome plastic mini toys and objects and make a necklace inspired by the charm necklaces we wore in elementary school.


I got the colored chain at hobby lobby and two large charms there, the gold bicycle and large black glasses, as well as two packs of miniature, bright colored Christmas ornaments. I bought two pairs of earrings at Claire's that I took apart for smaller bright colored charms, and the rest is either from my shadow boxes of cute mini things, or pieces of my kids toys or game pieces.

I love the end result, it's fun and playful and I had quite a few compliments on it last night, even strangers who were mildly obsessed with it. LOL. It's not superheavy since most of it is plastic.  The funny part is, I still have enough stuff that I could probably make an entire other necklace! LOL

Which are your favorite charms? 
Did you have one as a kid? 


Saturday, June 21, 2014

Geeked out organized bins


In preparation for the move, we emptied all the medicine cabinets and bathroom drawers and misc. stuff in linen closets in the house. Since we are going from 2 bathrooms to 4, it was important to get everything organized. After tossing out all the old stuff like expired meds, Goopy fingernail polish, and random toiletries we no longer use, I got these great bins for less than four bucks each and got it all sorted. 


To nerd out a bit more, I had some 8.5x11 card stock I had previously stencil spray inked, cut those in half lengthwise, labeled everything  and just stuck them in the side of the bins with the loot. 


This was Seriously easy, and since the big card stock "labels" cover the whole side of the bin, you can easily find what you need without seeing the hot mess inside. Easy Peasy process, with a great sense of satisfaction.

Being this organized before we move I think will really help us settle in more easily.

Like my descriptions?  Lol 

Tuesday, June 10, 2014

Daily doodles... One pen


Little doodles, just ink pen. 


Daily doodles....

I've begun using a bit of my quiet time most days to sit and draw or doodle, whatever words or Scriptures or meaningful content I find, it helps me to reflect more deeply on the words.

I've had some requests for friends who want to remember these or follow them or pin them, so I will post a few at a time.


I post these more regularly on Instagram, I am OriginalYouth there, if you want to follow.

Saturday, June 1, 2013

Super Easy Healthy Guilt Free Stir Fry!

Okay, so I don't have action shots on this one, cause I didn't plan on sharing it.  But it was so darn yummy!  And easy! And guilt free!

Ingredients:

That stuff, plus salt and pepper, powdered ginger, and just a bit of olive oil and chicken broth. 

1) heat 1t. olive or coconut oil to medium high in skillet
2) sauté thawed chicken (I had 4oz) 1 minute to quick sear
3) add 2cups veggies, sauté 2-3 minutes, add 1T. garlic, 1/2t. ginger, then 3T. chicken broth, s&p and 1/2t. liquid aminos (or soy sauce if you don't have the aminos.)
4) cook, stirring, 1-2 minutes or so until liquid is absorbed.  Season more to taste.
5) serve hot and be awesome.  

Serve over rice to make it into 2 meals. 

Nutritional info: (total calories 211!!!)

4 hours later and I'm still full!  That's a winner.

Thursday, May 30, 2013

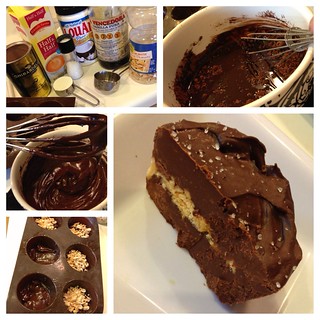
Cocoa Loco - Homemade Salted Dark Chocolate with Peanuts - with no fake stuff in there

Alrighty, this is my go-to sweet treat when I'm craving something chocolate (or something rotten for me).  I can whip up a batch of this treat in about 15 minutes, and it's ready in another 20 or so, and give me servings for 2 weeks or more.  I found a basic version of this a few years back (usually called 'Cocoa Crack' - it's popular with people doing Paleo or HCG) it was very different though, and I've modified this one over time to taste.
I'm calling it 'Cocoa Loco!!!!' although it's not realllllly crazy.  But it rhymes, and it gets me away from having to discuss the addictive properties of 'crack' with my kids. ;) 

To note: this is not going to taste like a Reece's peanut butter cup; cause it's not full of sugar and fake stuff that make those taste awesome.  It is going to taste more like a semi-sweet dark chocolate bar (maybe 70% dark), very yummy, but it won't fake people out who want to eat a yummy junk bar.  My hubby and kids do NOT like dark chocolate, which if fine by me, cause I don't have to share. :)
Cocoa Crack

Cocoa Loco
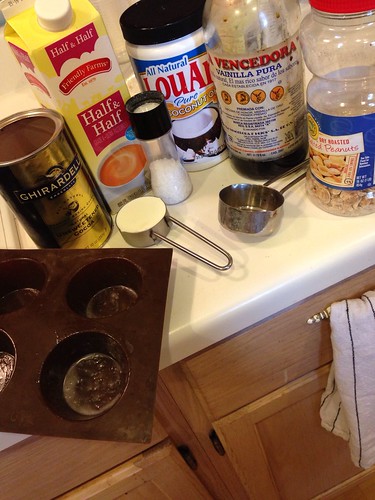
Ingredients - Makes 12 servings (or more if you have more self-control...)
  • 2/3c. Coconut Oil
  • 2/3c. Unsweetened Cocoa Powder (I'm using Ghiradelli now, but Hershey's or Nestle work too).
  • 10 packets Stevia (or stevia drops, to taste) (you could sub out the sweetener of your choice here)
  • 1/4c-1/2c.  Half and Half (or less, to taste)
  • 1/4 t. Vanilla (I like Mexican vanilla)
  • 1/3c Unsalted Dry Roasted Peanuts -optional - can substitute cashews, almonds, etc or have it without nuts
  • Sea Salt or Kosher Salt - Optional, to taste
    Cocoa Crack

    Directions:
    1. Lightly brush a silicone tray or dish with coconut oil (I use a 6-cup muffin tray)
    2. Measure coconut oil into microwavable dish, heat 30 seconds to liquify and warm
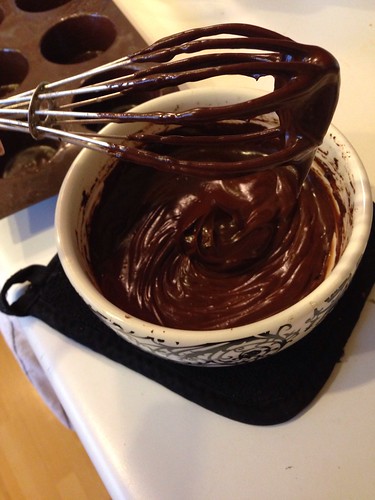
    3. While warm, whisk in cocoa powder until thoroughly mixed
      Cocoa Crack
    4. Immediately begin whisking in half and half; blending thoroughly to emulsify 
    5. Add vanilla, and stevia to taste.
      Cocoa Crack
      It will begin to thicken
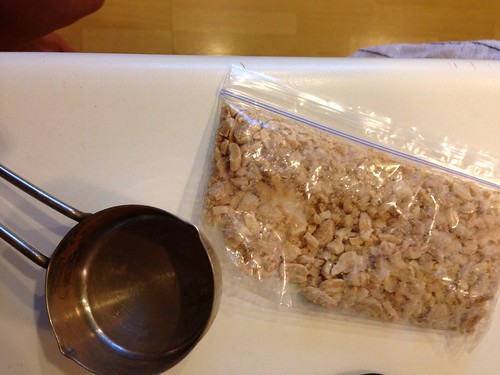
    6. Crush Peanuts.  I like to put them in a bag and bash them with a measuring cup. lol
      Cocoa Crack
    7. Add a layer of the Cocoa Mix to the bottom of the cups, then divide the peanuts and sprinkle on top.
      Cocoa Loco
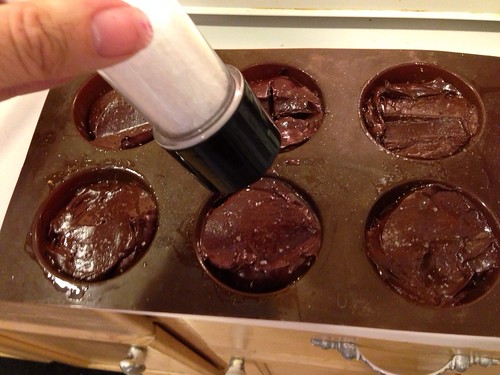
    8. Cover with remaining Cocoa.  Sprinkle sea salt on top (optional)
      Cocoa Crack
    9. Chill in the freezer 20+ minutes until soft-set, then remove and slice it into portions (this will be much harder when it is completely frozen firm).  Store in the freezer in ziploc bags or a sealed container.  It keeps for several weeks, at least.  You'll want to keep it cold until you eat it, because the coconut oil will soften and melt at room temperature. It will 'melt in your hands'.


      Variations: no nuts, more nuts, a few drops of flavored extract (orange is good, raspberry would be also, etc.), more half and half (gives it a creamier texture more like milk chocolate), less half and half (gives it more of a dark chocolate flavor), add dried fruit, etc.


      Here are the nutritional facts for it (made as recipe directs, above), divided into 12 servings.  This is obviously not a 'health food', as it has 20 grams of fat, but it is GOOD fat as compared to what is in most generic off-the-shelf snacks.  Having total control over your recipe helps too.  Just don't eat too many at once, or at least don't blame me. lol.
      Right now I'm doing a 2-week sugar detox (day 4, yay!) and I like having the option to have one of these little babies in the evening when I need a fix.

Friday, March 29, 2013

The Hair

While searching for pics on Pinterest of what to do next with my hair, I realized I should probably put a few of my own recent hair photos up; since I frequently get compliments about it.  I figure if I'm looking for ideas about new styles, someone else might possibly be inspired by mine.  :)

November 2012


I do my own color.  The grey streak is natural, it's scattered throughout, but is most concentrated on the right side so I just pull out that section when I color to let it stay natural.  The rest of my hair (dark brown) is the natural color, but I do give it a temp color every few months just to even out the greys.

January 2012 - curly!

The red streak is achieved by bleaching the tar out of it. lol.  Seriously though, I let it sit 1-2 hours the first time to reallly get it white so the red can be truly vivid.  My hair is great with this color, I only have to touch it up every 6 weeks or so.  I will just add the red back over my roots and the streak and let it sit a good hour.  Then, ever 2-3 months (the next time) I will bleach the roots again when I do it.  The first time I used 'Splat' luscious raspberries (2 in 1 kit) with great success - only $12 or so from the drug store.  For re-dyes, I use 'Manic Panic' vampire red (Sally beauty supply).  They are both very close in color. 

December 2011 - right  before I cut it

December 2011 - just after a fresh cut
I'm fortunate that I don't have to wash my hair more than 2x a week; I can get a good 3 days out of a blow-out, and wear it curly 1-2 days after a shower as well.  Then I'll add a hat or ponytail.  Since my job is so casual, I have to admit I have a ponytail at least 3 days per week.  I just don't need hair in my face when I have paint all over my hands! :)   Everyone is shocked when I tell them how long my color lasts - even the people at Toni & Guy were asking about it! lol.  I know the color could probably be way better if done by a professional, but I can't afford that.  $5/month to do it myself is good for me.

Here is my hair board on Pinterest with ideas about what to do next!  I'm REALLLLY wanting to go for it with the whole head, just even for once, to try it.  We will see if I get the guts.